Most ovens have stains and spills throughout the year that warrant a thorough cleaning before the holidays or big events. But while the self-clean feature seems like an easy solution, it may do more harm than good. Is it safe to use self-clean oven feature on a Whirlpool oven? Unfortunately, its high heat can cause part failures that require repair. Learn more about common oven issues arising from the self-clean feature and how to clean a Whirlpool oven with a safer, natural alternative.
Avoiding Self-Cleaning Oven Dangers: How to Clean a Whirlpool Oven Safely
While risking self-cleaning oven dangers seems worth it to simplify cleaning, our natural oven cleaner may make you think again. Wondering how to clean a Whirlpool oven safely? Before we detail how effective this simple method can be, understanding how the self-clean function works can better illustrate its risks.
How Does a Whirlpool Self-Cleaning Oven Clean Itself?
The self-clean feature uses high heat to burn away food stains, spills, and splashes. However, this heat goes beyond typical cooking temperatures, reaching upwards of 900℉ over a period of several hours. During this time, the oven door and all other control panel functions remain locked.
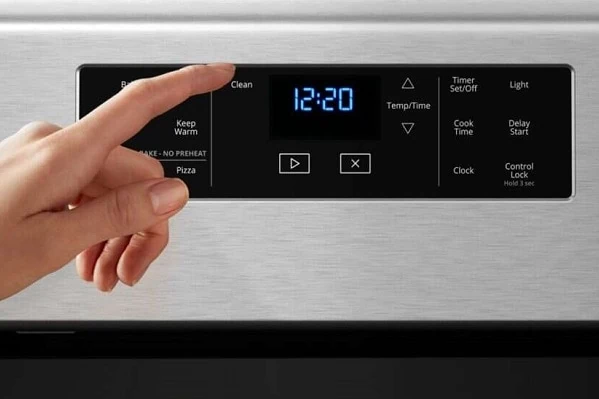
Once the cleaning cycle is complete, the door stays locked until the oven has sufficiently cooled, often requiring an additional hour. Once cooled, the door unlocks automatically so stains can be wiped away with a damp cloth.
Is a Self-Cleaning Oven Safe?
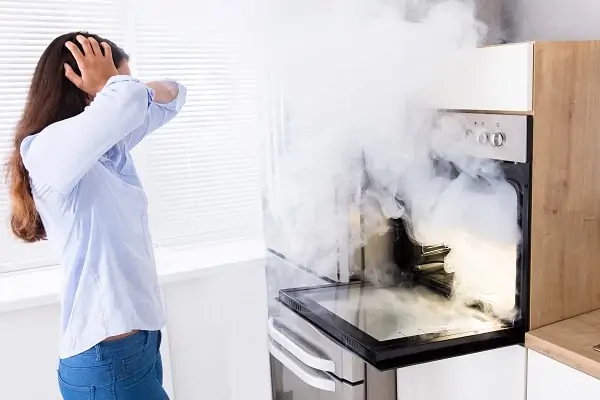
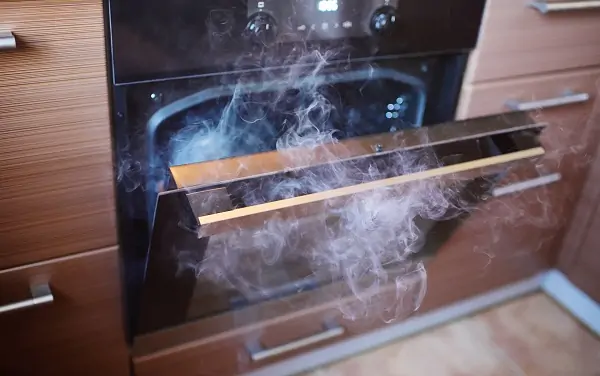
As simple as this feature sounds, there’s nothing easy about self-cleaning oven dangers and the problems they can cause. Unpleasant odors and uncomfortably warm temperatures can last for the duration of the cleaning cycle. However, part failures are one of the biggest reasons to avoid this oven feature. You’ll want to learn how to clean a Whirlpool oven safely to avoid these hazards.
The following are just some of the parts that can fail due to self-cleaning oven damage:
- Heating elements: These metal coils can break, crack or blister, resulting in an oven not baking evenly or at all.
- Thermostat: Unable to withstand prolonged heat exposure, the thermostat can “pop,” leaving it unable to measure the oven’s temperature fluctuations. Consequently, food can emerge under or overdone.
- Locking mechanism: If the door lock malfunctions from the intense heat, the oven door may remain locked even when the self-clean cycle ends. Repairing the lock and opening the oven door often requires professional assistance. As the weeks before and after the holidays are often the busiest for appliance services, you may have to wait weeks for a repair.
Should I use the self-cleaning oven feature at all? If you must use this feature, make sure you avoid doing so before a big event or important meal. That way, any resulting repair needs won’t impact your plans. Ensure that your kitchen is well-ventilated to dissipate odor, and avoid using the self-cleaning function on hot days that will exacerbate heat.
How to Clean a Whirlpool Oven Without Self-Clean
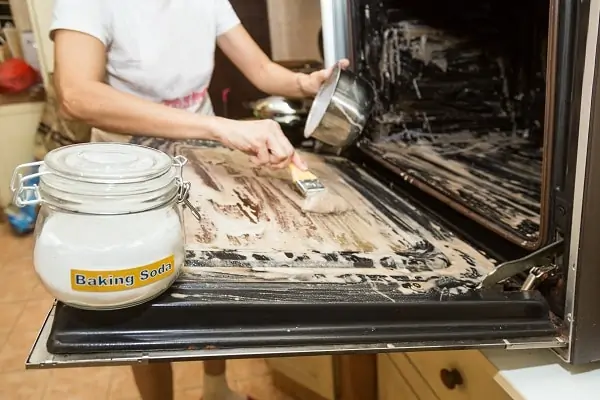
Are you searching for “What is the best homemade oven cleaner?” Keep reading for our step-by-step instructions. The best way to avoid self-cleaning oven dangers and remove stains is to use a DIY or natural oven cleaner. Follow our simple instructions on how to clean a Whirlpool oven.
Here’s what you’ll need:
- Sponge or scrubbing brush
- Plastic scraper or spatula
- Dish soap
- Baking soda
- Coarse salt
- Distilled white vinegar
Follow These Steps to Clean Your Oven Naturally:
Step 1. Remove racks and large debris: Removing the racks allows for better access to all four oven walls. Once the racks are removed, use a plastic scraper or spatula to scrape away large food particles.
Step 2. Mix cleaning paste: Combine dish soap, baking soda, and coarse salt until it forms a thick, spreadable paste.
Step 3. Apply paste: Spread the paste thickly on all four oven walls and allow it to sit overnight.
Step 4: Remove paste: Wipe down the oven walls with a damp sponge or scrub brush, scrubbing away debris.
Step 5. Spray with vinegar: Spray the oven walls with distilled white vinegar and wipe them down a final time to remove any lingering food particles and paste. Replace oven racks.
Even if you avoid the self-cleaning cycle, the need for oven repairs may still arise. When they do, call CD Appliance Repair for the best oven repair in Green Cove Springs!